We find that the bathroom is one of the easiest rooms to organize and can also have one of the biggest impacts! If your bathroom could use a little organization help, follow these easy tips to organize the bathroom and create your own spa-like retreat.
1. DECLUTTER FIRST.
Organizing the bathroom should always start with a good decluttering. Before you move on to the actual organizing, be sure to read this post for 20 items to declutter from the bathroom along with some great decluttering tips. There’s no point organizing stuff that you don’t use or need!
2. KEEP THE COUNTERS CLUTTER-FREE.
Keep as few items out on the counters as possible and use a tray to corral any products that you do want out. This creates a tidier look and makes it easier to clear off your counter for cleaning. Keep any items that you have on the counter confined to the back 1/3rd of the counter space to allow room for getting ready. This foaming soap pump not only looks pretty, but it also saves a ton of soap. You just need to fill it about 1/4 of the way with any of your favorite liquid soap and then add water to fill it up. You can find the free printable labels at the end of the post.
3. USE THE INSIDE OF CABINET DOORS FOR STORAGE
You can gain a ton of extra storage in your bathroom by using the inside of your cabinet doors. Use over the door organizers to hold a variety of items or hair styling products. Command Hooks work great to hang face towels or cleaning cloths and can easily be removed if you want to change things up. I love these toothbrush organizers to keep the boys’ toothbrushes out of sight but still easily accessible. They just stick directly to the cabinet door and the main piece pops out for easy cleaning.
4. USE DRAWER DIVIDERS.
There are so many little items that can get lost in those cluttered bathroom drawers! Draw dividers help to give everything a “home” and make it much quicker and easier to find what you’re looking for. Acrylic drawer dividers keep things tidy and keep the space light and airy. Store similar items together so you know where to find everything (and where to put items back!) You can even add some drawer liner if you’d like to add your own touch! NOTE: The toothbrushes, toothpaste, and razor in the photo below are EXTRA, UNSUED items. Obviously, I would not store them together if they were not brand new.
5. HAVE A CADDY FOR EACH MEMBER OF THE FAMILY
I find that having a caddy is such a help – both for myself and for my kids. Each of the boys has their own caddy filled with any personal care items that they use each day. Each morning, they just have to pull out the caddy, do their tasks, and put it back. Everything is all in one place {so they don’t forget any steps!} and it’s quick and easy to clean up. If you need one a little bigger, you could check out this one.
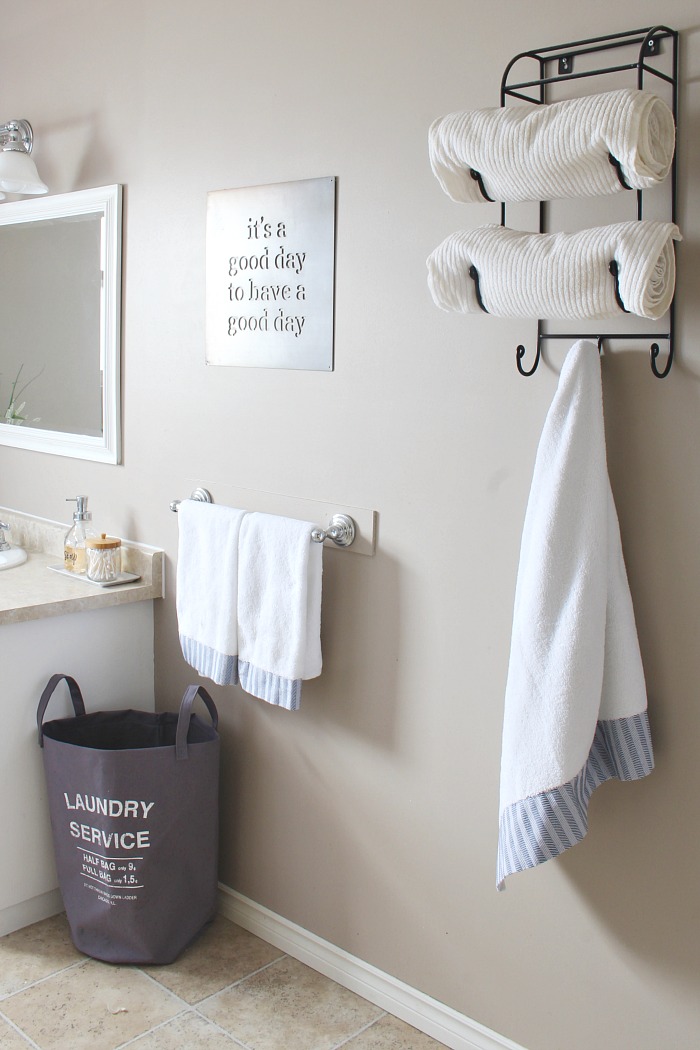
6. ADD A LAUNDRY BIN.
Having a laundry bin in the bathroom specifically for wet and dirty towels makes it quicker to clean up and way easier to do laundry! I like washing my towels separately from our clothing items as much as possible so this makes our laundry routine so much simpler.
7. HANG TOWELS FROM HOOKS INSTEAD OF TOWEL BARS.
It’s much easier to hang up bath towels on a hook than it is to hang them on a towel bar. Plus, it allows the towel to dry better. Save the towel bars for hand towels and get some hooks for everyone to hang their towels on – preferably a different hook for each family member. We try to re-use our towels as much as possible to cut down on washing, so it’s nice to know that you’re getting your own towel! If you don’t want to mount anything to the wall {or don’t have the space} try using over the door hooks.
8. USE CLEAR ACRYLIC CONTAINERS.
These hinged-lid acrylic containers are one of my favorites and work great for so many storage needs around the house. The medium size worked perfectly in our bathroom. Our end cupboards have these awkward bars across them {I’m assuming that the vanity was originally built for drawers} that make it difficult to utilize the space. I added a dish riser to create another shelf space and the acrylic bins fit like they were made for the space! The bins work great for stacking {I use them in our pantry} and the clear design allows you to easily see what’s inside.
9. LABEL, LABEL, LABEL.
Labels make it easier to find what you’re looking for and, even more importantly, where to put it back. Now your kids {and husband!} can’t tell you they don’t know where something goes! A cute label can also add more interest and personalization to your space. I used some Silhouette Clear Sticker paper for the labels in our bathroom just like I did for our fridge labels. Although the labels can be printed out on an ink jet printer, the ink can start to run if it gets wet. Having it printed on a laser printer {I just took my files to a copy place and had them printed for $2} will ensure that the ink will stay put. If you don’t want to use these labels, you can use a label maker, vinyl cutter, chalkboard labels or even just a Sharpie.
Post time: Jul-21-2020